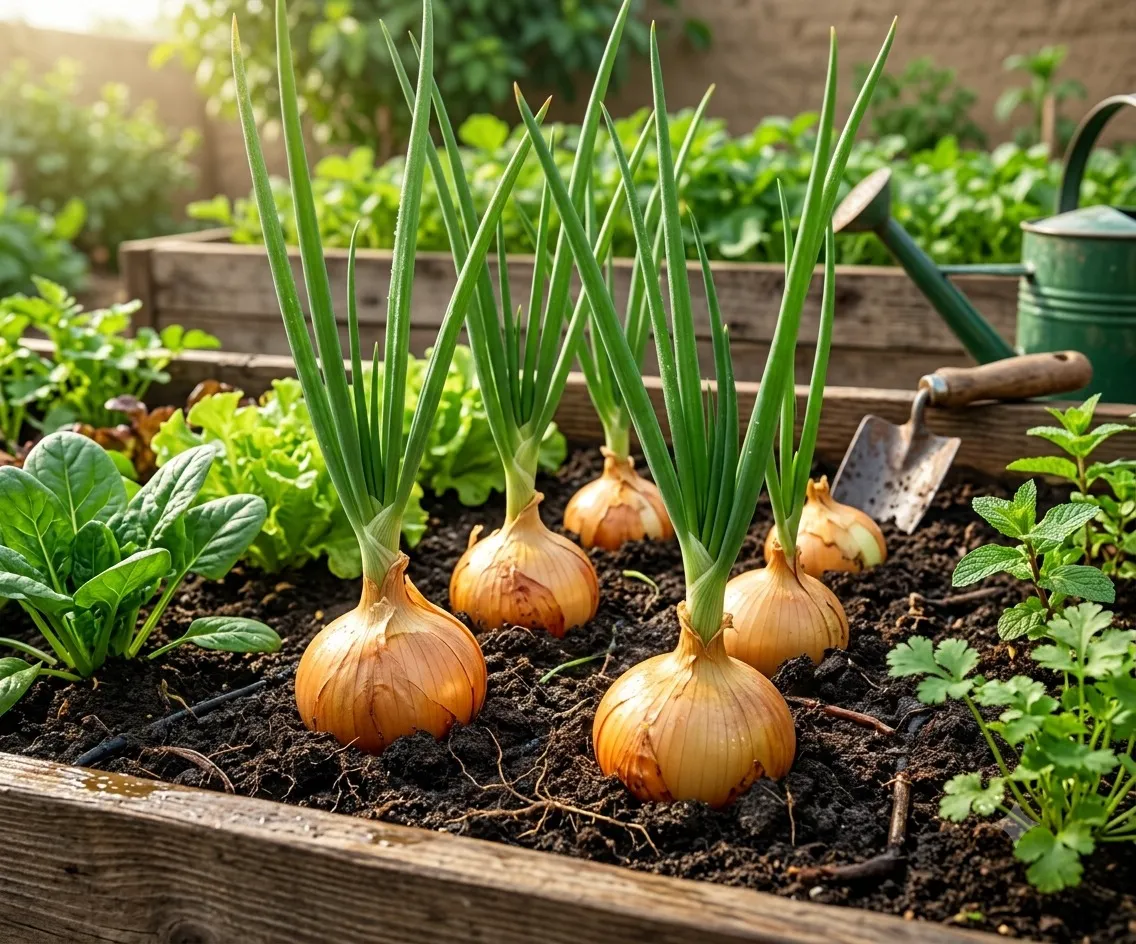
How to Grow Onions: A Complete Beginner’s Guide from Seed to Harvest
Have you ever planted onions only to end up with tiny bulbs, plants that never formed onions, or crops that rotted before you could store them? You’re not alone. Many beginner gardeners follow the basic planting steps but still struggle because they choose the wrong onion type, plant at the wrong time, or miss a few small details that make a big difference.
The good news is that onions are one of the most rewarding vegetables you can grow once you understand what they need. They require very little space, grow well in garden beds, raised beds, and containers, and many varieties can be stored for months after harvest.
One of the biggest lessons experienced gardeners learn is that successful onion growing starts long before planting day. Choosing the correct day-length variety for your region, preparing healthy soil, and maintaining consistent moisture throughout the growing season all have a direct impact on bulb size and storage quality. These simple practices often separate small disappointing onions from large, flavorful bulbs that last well into winter.
In this guide, you’ll learn how to grow onions step by step—from choosing seeds, sets, or transplants to planting, watering, fertilizing, harvesting, curing, and storing them successfully. Whether you’re growing your first crop or looking to improve last year’s harvest, this guide combines practical gardening advice with proven growing practices to help you achieve better results.
Why Grow Onions?
Onions are one of the most rewarding vegetables to grow, mainly because they’re productive, versatile, and genuinely easy to maintain once they’re in the ground. For additional information about onions and their nutritional value, see this onion growing guide.
Here are a few reasons gardeners love growing onions:
- They require very little garden space.
- They are easy for beginners to grow.
- Many varieties store for months after harvest.
- They can be planted early in the season.
- They grow well in vegetable gardens, raised beds, and containers.
- Fresh homegrown onions often have better flavor than store-bought onions.
With the right care, a single planting can provide onions for fresh meals throughout the summer, plus enough in storage to carry you through fall and winter.
Quick Growing Requirements
Before you start planting, here is a quick overview of what onions need to grow successfully.
| Requirement | Recommendation |
| Botanical Name | Allium cepa |
| Plant Type | Cool-season vegetable |
| USDA Hardiness Zones | 3–10 (depending on variety) |
| Sunlight | At least 6–8 hours of full sun daily |
| Soil pH | 6.0–7.0 |
| Soil Type | Loose, fertile, well-drained soil |
| Planting Depth | ¼–½ inch for seeds, 1–2 inches for sets |
| Plant Spacing | 3–4 inches |
| Row Spacing | 12–18 inches |
| Water | About 1 inch per week, including rainfall |
| Days to Harvest | Approximately 90–180 days, depending on the planting method and variety |
Types of Onions
Not all onions grow the same way, so before planting, it’s worth choosing a variety that actually matches your climate and how you plan to use the harvest.
Bulb Onions
Bulb onions are the most common type grown in home gardens, and they develop large underground bulbs available in several different colors.
Common bulb onions include:
- Yellow onions
- Red onions
- White onions
- Sweet onions
Yellow onions tend to be the most versatile for everyday cooking. Red onions are popular in salads and sandwiches, while sweet onions carry a mild flavor and are often eaten fresh.
Green Onions (Scallions)
Green onions are harvested before a large bulb has a chance to form. They grow quickly and are commonly used in soups, salads, stir-fries, and as a garnish.
Shallots
Although technically different from true onions, shallots are grown using very similar methods. They produce clusters of small bulbs with a sweeter, milder flavor than standard bulb onions.
Understanding Onion Day Length
One of the biggest reasons onions fail to produce large bulbs comes down to planting the wrong type for your region. Unlike many other vegetables, onions actually begin forming bulbs based on the number of daylight hours they receive, not just the calendar date.
Long-Day Onions
Long-day onions need about 14 to 16 hours of daylight before they begin forming bulbs, which is why they perform best in the northern parts of the United States, where summer days run longer.
Popular long-day varieties include:
- Walla Walla
- Patterson
- Red Wing
- Yellow Sweet Spanish
Short-Day Onions
Short-day onions begin bulbing once they receive around 10 to 12 hours of daylight, and these varieties grow best in southern states with mild winters.
Popular short-day varieties include:
- Texas Super Sweet
- Yellow Granex
- Red Creole
Intermediate-Day (Day-Neutral) Onions
Intermediate-day onions need about 12 to 14 hours of daylight to begin bulbing. Onion bulb development is controlled by day length, or photoperiod, which is exactly why choosing the correct onion type for your region matters so much; onions only begin forming bulbs once they’ve received the required number of daylight hours for that particular variety.
These onions tend to be a good choice for gardeners in the central United States, since they perform reasonably well across a wider range of climates than either long-day or short-day types.
If you’re unsure which onion to grow, it’s worth checking the variety label or seed packet before planting. Choosing the correct day-length onion is genuinely one of the most important steps toward growing large, healthy bulbs.
How to Grow Onions for Big Bulbs
Understanding how onions actually develop bulbs will help you grow a noticeably better harvest.
Bulb formation begins once the onion receives the correct number of daylight hours for its variety, but day length is really only part of the process. Before the bulb starts to enlarge, the plant first needs time to produce healthy green leaves.
Each green leaf eventually becomes one ring inside the finished onion bulb, so in general, more healthy leaves translate into more bulb rings and a larger onion at harvest time.
This is exactly why planting onions early, providing consistent moisture, and feeding them properly during early growth matter so much. Strong leaf development lays the foundation for large, healthy bulbs later in the season.
Studies from university extension programs explain that every healthy onion leaf contributes one storage scale, or ring, to the developing bulb. Encouraging vigorous leaf growth before bulbing begins is one of the most effective ways to increase bulb size.
Onion Seeds, Onion Sets, or Onion Plants: What’s the Difference?
There are three common ways to grow onions, and each method comes with its own set of advantages worth weighing before you decide.
| Method | Best For | Advantages | Considerations |
| Onion Seeds | Gardeners who want the widest variety | Lowest cost and largest selection | Takes the longest to reach harvest |
| Onion Sets | Beginners | Easy to plant and quick to establish | Fewer varieties are available and some may bolt in cool weather |
| Onion Plants (Transplants) | Gardeners who want larger bulbs sooner | Strong early growth and easier spacing | Usually cost more than seeds or sets |
Which Planting Method Saves the Most Money?
If you’re growing a large number of onions, seeds are usually the most economical choice, since they offer the widest variety at the lowest cost per plant. Onion sets are convenient for beginners, but they generally cost more per plant in the end.
Transplants strike a balance between convenience and performance, often producing larger bulbs while still requiring less growing time than starting from seed.
Choosing the Best Planting Method
| If You Want To… | Best Choice |
| Spend the least money | Seeds |
| Grow rare varieties | Seeds |
| Get the easiest start | Sets |
| Harvest sooner | Transplants |
| Grow larger bulbs | Transplants |
| Best option for beginners | Sets |
When to Plant Onions
The best time to plant onions depends on your climate and the type of onion you’ve chosen. Since onions are a cool-season crop, they grow best when temperatures stay on the mild side.
In most parts of the United States, onions go into the ground in early spring, as soon as the soil can actually be worked. In warmer regions, short-day onions are often planted in fall instead, and harvested the following spring or early summer.
Use this general planting guide:
| Region | Best Planting Time | Best Onion Type |
| Northern U.S. | March to April | Long-day onions |
| Central U.S. | March to April | Intermediate-day onions |
| Southern U.S. | October to January | Short-day onions |
Always double-check the recommended planting time for the specific variety you’ve purchased, since exact windows can shift slightly by region.
Both methods can produce healthy onions, and the right choice really depends on your growing season and the space you have available.
Starting Onions Indoors
Starting onions indoors gives the plants a head start, which matters especially in areas with short summers. Begin sowing seeds about 8 to 10 weeks before your last expected frost.
To start onion seeds indoors:
- Fill seed trays or small pots with seed-starting mix.
- Sow seeds about ¼ inch deep.
- Water gently until the soil is evenly moist.
- Keep the temperature between 65°F and 75°F for good germination.
- Place seedlings under grow lights or in a bright sunny window.
Most onion seeds germinate within 7 to 14 days. As the seedlings grow, trim the leaves to about 4 to 5 inches tall if they get long or floppy, since this encourages stronger root growth and makes the seedlings easier to handle later on.
Direct Sowing Outdoors
Gardeners with longer growing seasons have the option to sow onion seeds directly into the garden instead of starting them indoors first.
Wait until the soil is workable and temperatures reach about 50°F (10°C) before sowing. Plant seeds in loose, weed-free soil that receives full sun throughout the day.
Direct sowing saves indoor growing space and skips the transplanting step entirely. That said, onions started this way generally take longer to mature than transplants do. In regions with short growing seasons, starting seeds indoors usually produces larger bulbs before the end of summer arrives.
Hardening Off Onion Seedlings
If you started your onions indoors, avoid moving them directly into the garden all at once, since young plants need time to adjust to outdoor conditions first.
Begin hardening them off about 7 to 10 days before transplanting. A simple hardening schedule looks like this:
- Day 1: Place seedlings outside for 2 hours.
- Day 2: Increase to 4 hours.
- Day 3–5: Leave them outside for half the day.
- Day 6–7: Leave them outside all day.
- Final Days: If temperatures stay above freezing, leave them outside overnight.
This gradual process helps prevent transplant shock and encourages stronger growth once the seedlings finally go into the garden bed.
Preparing the Soil
Healthy soil is the real foundation of a successful onion crop, so it’s worth taking the time to get it right before anything goes in the ground.
Onions grow best in loose, fertile soil that drains well. Heavy clay soil, on the other hand, can slow bulb development and increase the risk of rot considerably.
Before planting:
- Remove weeds and rocks.
- Mix in compost or well-rotted organic matter.
- Break up large soil clumps.
- Level the planting area.
Ideal Soil Conditions
| Soil Factor | Recommended Range |
| Soil pH | 6.0–7.0 |
| Drainage | Well-drained |
| Organic Matter | High |
| Sunlight | At least 6–8 hours daily |
It’s best to avoid using fresh manure, since it may introduce weeds and encourage excessive leaf growth at the expense of large bulbs.
University extension recommendations suggest growing onions in loose, well-drained soil with a pH between 6.0 and 7.0, and adding compost or well-rotted organic matter to improve soil structure, drainage, and nutrient availability.
Fertilizing Before Planting
Onions are heavy feeders, and they genuinely benefit from nutrient-rich soil right from the start.
Before planting:
- Add compost to improve soil structure.
- Apply a balanced vegetable fertilizer if needed.
- Follow the fertilizer label based on your soil conditions.
Nitrogen matters most during early growth, since onion bulbs ultimately develop from healthy green leaves. Too much nitrogen later in the season, however, can delay bulb maturity and reduce storage quality.
How to Plant Onions
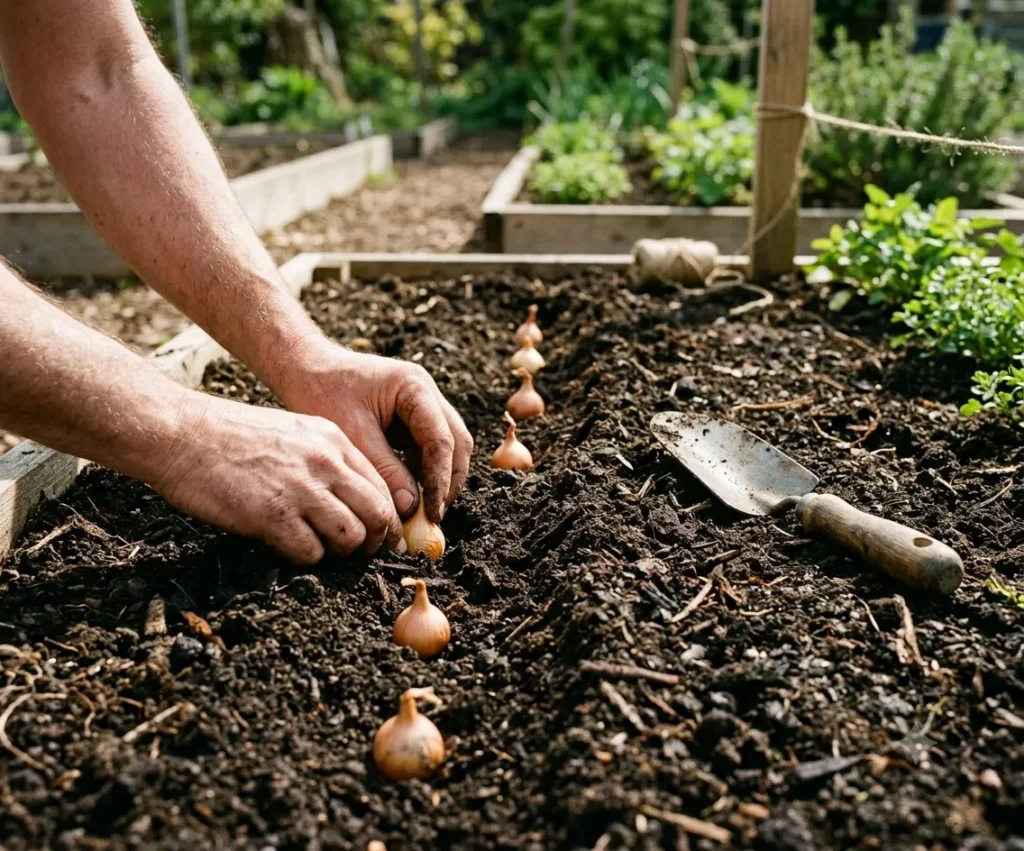
Once your soil is ready, it’s time to actually get planting. The method depends on whether you’re using seeds, sets, or transplants, but proper spacing matters across all three approaches.
Planting Onion Seeds
- Make shallow rows.
- Sow seeds about ¼ to ½ inch deep.
- Space rows 12 to 18 inches apart.
- Water gently after planting.
- Thin seedlings to 3 to 4 inches apart once they are a few inches tall.
Proper spacing here is what ultimately allows the bulbs to grow to their full size.
Planting Onion Sets
Onion sets are quick and easy to get into the ground.
- Place each set with the pointed tip facing upward.
- Plant about 1 to 2 inches deep.
- Leave 3 to 4 inches between each onion.
- Space rows 12 to 18 inches apart.
- Cover lightly with soil and water well.
Planting Onion Transplants
If you’re planting young onion plants:
- Carefully separate the roots.
- Trim damaged roots if needed.
- Place each transplant upright in the planting hole.
- Firm the soil gently around the roots.
- Water immediately after planting.
If the roots are especially long, you can trim them to about 2 inches before planting. Some gardeners also shorten the tops to around 4 inches, which makes transplanting easier and helps the plants focus their energy on establishing strong root systems during their first few weeks in the garden.
Some leaves may bend over during the first few days after transplanting, and that’s completely normal; healthy plants usually recover quickly on their own.
Spacing Guide for Bigger Bulbs
One of the most common mistakes beginners make is planting onions too close together. Crowded plants end up competing for water, nutrients, and sunlight, which often results in disappointingly small bulbs.
Use this spacing guide:
| Onion Type | Plant Spacing | Row Spacing |
| Bulb onions | 3–4 inches | 12–18 inches |
| Green onions | 1–2 inches | 12 inches |
| Shallots | 4–6 inches | 12–18 inches |
If large storage onions are your goal, it’s worth resisting the temptation to reduce the recommended spacing, even when garden space feels tight.
Can You Grow Onions in Raised Beds?
Yes, and raised beds are actually one of the best places to grow onions. They provide:
- Better drainage
- Warmer soil in spring
- Easier weed control
- Improved root development
Fill raised beds with fertile, loose soil rich in organic matter, and follow the same planting depth and spacing you’d use in a traditional garden bed.
If you’re growing onions in a raised bed, avoid overcrowding the plants. Raised beds often tempt gardeners into planting more than the recommended spacing, but onions still need room for their bulbs to expand properly. A spacing of 3 to 4 inches between plants usually produces larger storage onions.
Raised beds also warm up faster in spring and drain more efficiently than traditional garden beds do. That means you can often plant earlier in many regions, while also reducing the risk of bulb rot caused by overly wet soil.
Can You Grow Onions in Containers?
Absolutely. If space is limited, onions grow perfectly well in containers.
Choose a pot that is:
- At least 10 to 12 inches deep
- Wide enough for several onions
- Equipped with drainage holes
Use high-quality potting mix instead of garden soil, and place the container where it receives 6 to 8 hours of direct sunlight each day.
Container-grown onions dry out faster than those in garden beds, so it’s worth checking the soil often and watering whenever the top inch begins to dry out.
For the best results, choose compact or bunching onion varieties if your container is on the smaller side. Larger bulb onions perform better in wide containers that give them enough room for proper bulb development.
Since potting mix dries out faster than garden soil, check moisture levels regularly, especially during hot summer weather when containers can dry out surprisingly quickly.
Common Planting Mistakes to Avoid
Avoiding a handful of common mistakes gives your onions the best possible chance of success.
- Choosing the wrong day-length onion for your location.
- Planting in heavy, poorly drained soil.
- Crowding plants too closely together.
- Planting too deep.
- Growing onions in too much shade.
- Skipping compost or soil preparation.
- Transplanting seedlings without hardening them off.
- Letting weeds compete with young onion plants.
Taking a little extra time during planting genuinely pays off later, in the form of larger, healthier onions come harvest season.
Watering Onions the Right Way
Water is one of the biggest factors in growing large, healthy onions. Because onion roots stay fairly shallow, they can’t pull moisture from deep in the soil the way many other vegetables can.
The goal is to keep the soil evenly moist without ever letting it become waterlogged. As a general rule, onions need about 1 inch of water per week, including rainfall, though you may need to water more often during hot or dry stretches.
A deep watering once or twice a week is usually more effective than light watering every single day.
Watering by Growth Stage
| Growth Stage | Watering Needs |
| Germination | Keep the soil consistently moist. |
| Seedlings | Water whenever the top inch of soil begins to dry. |
| Leaf Growth | About 1 inch of water each week. |
| Bulb Formation | Maintain steady moisture for larger bulbs. |
| Before Harvest | Reduce watering when the tops begin to fall over. |
It’s important to avoid overwatering during the final weeks before harvest, since excess moisture at that stage can increase the risk of bulb rot and shorten storage life significantly.
Fertilizing Onions Throughout the Season
Onions need a steady supply of nutrients to produce healthy leaves, since each leaf ultimately forms one layer of the bulb. Strong leaves usually translate directly into larger onions at harvest.
Early Growth
Once the plants are well established, apply a nitrogen-rich fertilizer to encourage leafy growth. Good options include:
- Compost
- Fish emulsion
- Blood meal
- Balanced vegetable fertilizer
It’s best to apply fertilizer alongside the row rather than directly on the plants themselves.
Bulb Formation
Once the bulbs begin to swell, it’s time to scale back nitrogen applications. Too much nitrogen at this stage encourages more leaf growth instead of larger bulbs, and can shorten storage life as a result.
Continue watering regularly throughout this stage while letting the bulbs mature naturally on their own timeline.
Mulching and Weed Control
Weeds compete directly with onions for water, sunlight, and nutrients, so keeping them in check matters more than it might seem.
Because onion roots stay shallow, it’s best to avoid deep cultivation that could damage the bulbs underground. Instead, mulch is a much safer way to keep weeds under control.
Good mulch options include:
- Clean straw
- Grass clippings that are free of weed seeds
- Shredded leaves
- Compost
Mulch also helps:
- Keep soil moist
- Reduce soil temperature changes
- Prevent weed growth
- Reduce watering needs
Pulling weeds by hand whenever possible, especially close to the plants, is usually the safest approach.
Because onions have shallow root systems, they simply don’t compete well with weeds. Even a small amount of weed growth can reduce bulb size by competing for water, nutrients, and sunlight. Keeping the bed weed-free throughout the growing season gives onions the best possible chance to produce large, healthy bulbs.
Companion Planting for Onions
Onions naturally help repel some garden pests, thanks to their strong smell, and growing them near compatible vegetables can genuinely improve the health of your whole garden.
Best Companion Plants
These plants grow well with onions:
- Carrots
- Lettuce
- Tomatoes
- Cabbage
- Broccoli
- Kale
- Beets
- Strawberries
- Peppers
- Dill
Many gardeners also grow onions near brassicas, since they may help discourage certain cabbage pests in the process.
Plants to Avoid
Some plants simply don’t grow well alongside onions. Avoid planting onions near:
- Peas
- Beans
- Asparagus
These crops tend to compete for nutrients, or perform better overall when kept in a separate bed.
Crop Rotation
Crop rotation is one of the simplest ways to reduce pest and disease problems over time. Avoid planting onions, garlic, shallots, or other members of the onion family in the same spot every year; instead, rotate them to a different garden bed every 3 to 4 years.
This practice helps reduce the buildup of soil-borne diseases and pests, including onion maggots and basal rot, while keeping your soil healthier season after season.
Growing Onions Organically
Growing onions organically starts with healthy soil. Mixing compost into the planting bed before sowing, and using organic mulch to conserve moisture and suppress weeds, sets the whole season up for success.
Inspect plants regularly for pests and remove damaged leaves when needed. Encouraging beneficial insects and rotating crops each season can also cut down on pest problems considerably, without needing to rely on synthetic pesticides at all. Some gardeners let backyard chickens work the beds between plantings, since they eat pest larvae and their composted bedding improves soil structure.
Common Onion Pests
Even though onions are relatively easy to grow, several insects can still damage your crop if left unchecked. Checking your plants every week helps catch problems early, before they spread.
Onion Maggots
Onion maggots attack underground bulbs directly.
Signs
- Wilting leaves
- Soft bulbs
- Poor growth
- Rotting roots
Prevention
- Rotate crops every year.
- Remove old onion debris.
- Avoid planting onions in the same location each season.
Thrips
Thrips are tiny insects that feed on onion leaves.
Signs
- Silvery streaks on leaves
- Curled foliage
- Reduced bulb size
Prevention
- Keep weeds under control.
- Water during dry periods.
- Encourage beneficial insects in the garden.
Common Onion Diseases
Healthy soil and good airflow go a long way toward preventing many onion diseases before they start. It’s best to avoid planting onions in wet soil and to rotate crops regularly as a matter of course.
Downy Mildew
This fungal disease tends to appear during cool, damp weather.
Symptoms
- Yellow leaves
- Gray or purple fuzzy growth
- Slow bulb development
Prevention
- Space plants properly.
- Improve air circulation.
- Water the soil instead of the leaves.
Neck Rot
Neck rot often develops after harvest, usually once the onions are already in storage.
Symptoms
- Soft neck tissue
- Mold inside the bulb
- Rot during storage
Prevention
- Harvest mature onions.
- Cure onions completely before storing.
- Store onions in a cool, dry place.
Basal Rot
Basal rot is a soil-borne disease that affects the base of the bulb specifically.
Symptoms
- Yellow leaves
- Brown roots
- Soft bulbs
Prevention
- Rotate crops.
- Improve drainage.
- Remove infected plants immediately.
Why Do Onions Bolt?
Bolting happens when an onion produces a flower stalk before the bulb has had a chance to fully develop. It’s usually triggered by sudden temperature changes, or by planting oversized onion sets in the first place.
Once an onion bolts, it redirects its energy into producing flowers and seeds instead of continuing to enlarge the bulb. If you notice a flower stalk forming, it’s best to remove it as soon as possible and use the onion while it’s still fresh, since bolted onions generally don’t store as well as properly matured bulbs.
Why Are My Onions Not Growing?
If your onions are struggling, one of these common problems is usually the culprit.
| Problem | Possible Cause | Solution |
| Small bulbs | Plants too close together | Thin plants to proper spacing. |
| No bulbs | Wrong day-length variety | Choose the correct onion type for your region. |
| Yellow leaves | Water stress or nutrient deficiency | Water consistently and fertilize if needed. |
| Bulbs rotting | Poor drainage or overwatering | Improve soil drainage and reduce watering. |
| Flower stalks (bolting) | Cold stress or large sets | Remove flower stalks and harvest early if necessary. |
Most onion problems can genuinely be prevented by choosing the right variety, preparing the soil well, and sticking to a consistent watering schedule throughout the season.
Growing Bigger Onions: Expert Tips
If your goal is large, healthy bulbs, follow these simple practices:
- Plant the correct day-length variety for your region.
- Grow onions in full sun for at least 6 to 8 hours each day.
- Improve the soil with compost before planting.
- Space plants 3 to 4 inches apart.
- Feed with nitrogen early in the season.
- Keep weeds under control.
- Water consistently during bulb development.
- Stop fertilizing once bulbs begin to enlarge.
- Reduce watering as harvest approaches.
- Harvest only after most tops have naturally fallen over.
These small improvements often end up making the difference between golf-ball-sized onions and genuinely large storage bulbs.
Harvesting Onions
When to Harvest Onions
Knowing when to harvest matters just as much as knowing how to plant in the first place. Harvesting too early can leave you with smaller bulbs that don’t store well, while waiting too long increases the risk of rot if the weather turns wet.
You don’t actually have to wait until onions reach full size before harvesting them. Young onions can be pulled earlier and used just like green onions in salads, soups, stir-fries, and other fresh dishes.
If you’re planning to store onions for several months, it’s best to let the bulbs mature fully before harvesting them.
Most onions are ready to harvest when:
- About 50–80% of the tops have fallen over naturally.
- The leaves begin turning yellow or brown.
- The neck of the onion becomes soft.
- The bulbs have reached their expected size.
Avoid bending the tops over yourself; letting the plants mature naturally gives you the best storage quality in the end.
How to Harvest Onions
Choose a dry, sunny day if possible, then follow these simple steps:
- Gently loosen the soil around each onion with a garden fork or hand trowel.
- Lift the bulbs carefully without damaging the outer skin.
- Shake off loose soil.
- Do not wash the onions.
- Leave the leaves and roots attached until curing is complete.
Handle onions gently throughout this process, since bruised bulbs tend to spoil much faster during storage.
How to Cure Onions
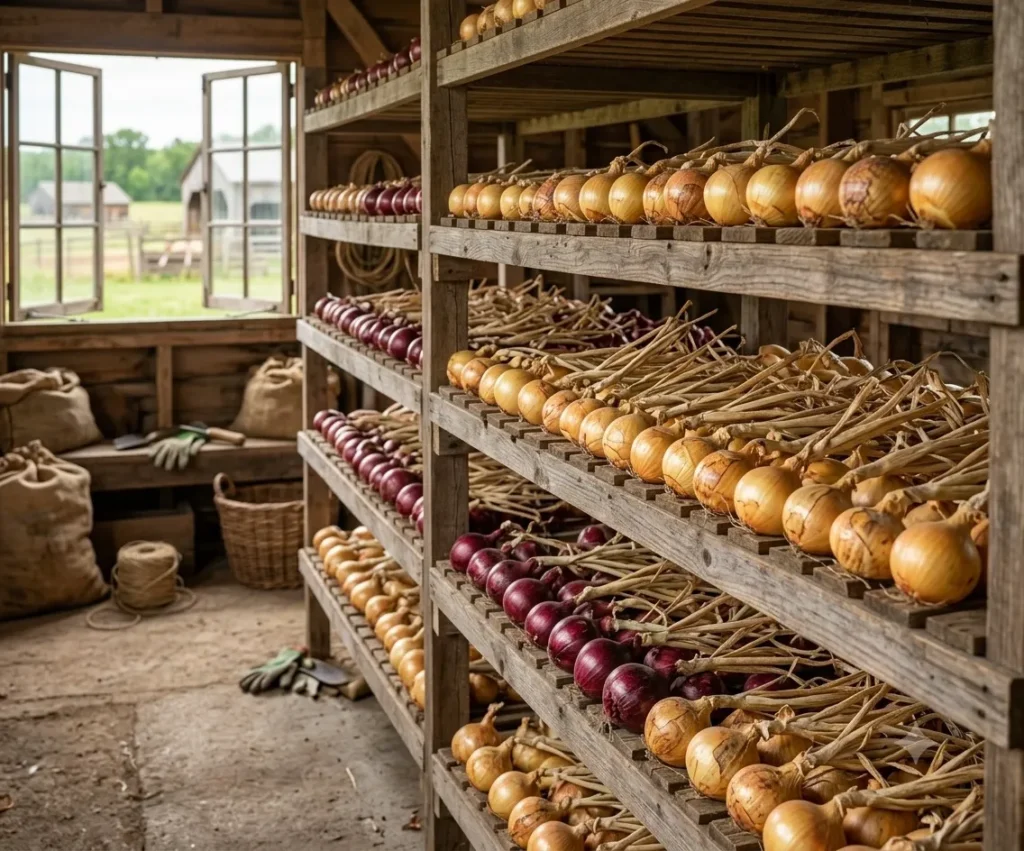
Curing dries the outer layers and seals the neck of the onion, and this process is what actually helps prevent mold, rot, and moisture loss during storage.
Step 1: Initial Drying
Place freshly harvested onions in a warm, dry location with good airflow. You can cure them:
- On a wire rack
- On a screen
- On a table
- In a garage
- Under a covered porch
It’s best to avoid leaving onions in direct sunlight for long periods, especially during very hot weather, since this can damage the outer skin.
Step 2: Allow Time to Dry
Most onions need 2 to 3 weeks to cure completely. They’re fully cured when:
- The neck is completely dry.
- The roots are dry and brittle.
- The outer skin feels papery.
- The bulbs feel firm.
If the weather is especially humid, curing may take a little longer than usual.
How to Store Onions
Proper storage can keep onions fresh for several months, provided the conditions are right from the start.
The ideal storage conditions are:
| Storage Factor | Recommendation |
| Temperature | 32°F–40°F (0°C–4°C) if possible |
| Humidity | Low humidity |
| Airflow | Excellent ventilation |
| Light | Dark location |
Good storage options include:
- Mesh bags
- Wire baskets
- Wooden crates
- Braided onion tops
- Hanging net bags
Never store onions in sealed plastic bags, since moisture becomes trapped inside, which leads to mold and rot fairly quickly.
Month-by-Month Onion Growing Calendar
Use this calendar as a general guide; exact timing depends on your climate and onion variety.
| Month | Gardening Task |
| January | Order seeds and plan your garden. |
| February | Start onion seeds indoors in colder regions. |
| March | Continue caring for seedlings and prepare garden beds. |
| April | Harden off seedlings and transplant outdoors where conditions allow. |
| May | Weed, water, and fertilize regularly. |
| June | Maintain even soil moisture and monitor for pests. |
| July | Bulbs begin enlarging. Continue watering consistently. |
| August | Harvest mature onions and begin curing. |
| September | Finish curing and place onions into storage. |
| October–December | Check stored onions regularly and use any damaged bulbs first. |
Common Beginner Mistakes
Even experienced gardeners make mistakes from time to time, and knowing what to avoid can noticeably improve your harvest.
- Choosing the wrong onion type for your region.
- Planting onions too close together.
- Growing onions in heavy or poorly drained soil.
- Overwatering before harvest.
- Applying too much nitrogen late in the season.
- Harvesting before the bulbs are fully mature.
- Skipping the curing process.
- Storing onions where moisture builds up.
Correcting just one or two of these mistakes can make a noticeable difference in both bulb size and how well your onions store afterward.
Final Thoughts
Growing onions isn’t difficult, but paying attention to the small details can make a noticeable difference in your harvest. Choosing the right day-length variety, planting in fertile, well-drained soil, watering consistently, and harvesting only when the bulbs are fully mature are the habits that experienced gardeners rely on year after year.
If your first crop isn’t perfect, don’t be discouraged. Every growing season teaches something new. Many gardeners improve their results simply by adjusting planting time, spacing, or watering the following year. These small changes often lead to larger bulbs, healthier plants, and onions that store much longer.
Use this guide as a seasonal reference rather than a one-time read. As you gain experience, you’ll better understand how onions respond to your local climate and growing conditions, making it easier to produce a reliable harvest each year. With patience and consistent care, growing onions can become one of the most dependable and rewarding parts of your vegetable garden.
Frequently Asked Questions
How long does it take to grow onions?
Most bulb onions take 90 to 120 days from sets or transplants. Onions grown from seed usually take longer, typically 110 to 180 days depending on the variety.
Can onions grow in partial shade?
Onions grow best in full sun. They need at least 6 to 8 hours of direct sunlight each day for good bulb development, and shade tends to noticeably reduce bulb size.
Can I grow onions from a store-bought onion?
You can regrow green onion leaves from a store-bought onion, but growing large, healthy bulbs is far more reliable when you start with certified seeds, sets, or transplants instead.
How many onions grow from one plant?
Most bulb onion plants produce a single large onion. Some multiplying onion varieties, though, produce several bulbs from just one plant.